从零到1搭建Hexo-Butterfly博客并通过GitHub导入vercel托管实现全球访问
B站视频演示:
YouTube视频演示:
安装Windows博客环境
1.安装环境node.js:
官网https://nodejs.org/en/ 下载稳定版并安装2.安装git bash
官网https://git-scm.com/download/win 下载并安装3.创建博客文件夹,例如Blog
进入文件夹右键打开git bash命令启用 Hexo镜像,输入 npm config set registry https://registry.npm.taobao.org

开始全局安装 Hexo,输入 npm install -g hexo-cli

git bash 中输入: hexo init 自定义博客名
4.编译静态文件到public文件夹(根目录会自动生成public文件夹),输入: hexo g
5.启动本地预览(输入 http://localhost:4000 ,能正常访问,则启动成功。不要关闭命令窗口!),输入: hexo s
创建并绑定GitHub博客项目
1.电脑本地生成SSH密钥(Blog文件夹下面,右键git bash)
# 先在GitHub上新建命名一个public项目
git config --global user.name "你的GitHub用户名"

 git config --global user.email "你注册github的邮箱"

ssh-keygen -t rsa -C "你注册github的邮箱"   # 生成密匙命令后,在C:\Users\你的当前Windows登录用户\\.ssh\id_rsa.pub文件里面

打开GitHub,在 设置-SSH and GPG keys-New SSH Key-粘贴id_rsa.pub里面的公钥
2.Windows本地验证是否成功(Blog文件夹下面,右键git bash)
git bash输入: ssh -T git@github.com3.在文件夹中找到_config.yml文件,在文件内最后替换
2
3
type: git
repo: https://github.com/你的github用户名/你的github用户名.github.io.git,main
本地安装butterfly博客主题
(Blog文件夹下面你命名的github文件夹下面,右键git bash)
1.git bash 输入: git clone -b master https://github.com/jerryc127/hexo-theme-butterfly.git themes/butterfly
2.安装渲染器
输入: npm install hexo-renderer-pug hexo-renderer-stylus --save
# 注意有的电脑可能缺少插件,同时安装下面的插件
npm install hexo-deployer-git --save
3.修改 Hexo 根目錄下的 _config.yml,把主題改為 butterfly
2
3
4
## Plugins: https://hexo.io/plugins/
## Themes: https://hexo.io/themes/
theme: butterfly4.清理缓存①,本地重新生成静态文件②,推送到github的命令③,每次更新完内容执行此命令
hexo clean && hexo g && hexo de
# 电脑会弹窗让你进行登录GitHub的身份验证,跳转浏览器打开登录执行相应的操作即可。
访问网址预览成功效果: https://你的GitHub用户名.github.io
vercel部署博客并自定义域名(为了Hello World)
截止到写这篇文章的时候,vercel在大陆已经被DNS污染了,所以大陆无法访问。但是https://XX.github.io却可以访问。通过vercel绑定购买的域名也是可以全球互联的。
1.谷歌账户注册vercel: https://vercel.com/
注册后导入并绑定你的GitHub博客仓库,import > reply > visit

进入setting > Domain,vercel官方已经给了一个全球可访问的域名

需要高大上并氪金的看步骤2: 导入你想要添加的域名,vercel会给你的模板,留到步骤2使用。
2.购买域名(非必选)
网站推荐1: https://www.namesilo.com/  也可以搜一下教程挑选其他家域名网站,这家的好处是无套路老品牌且支付宝可付款,首次购买可使用抵扣码省钱。

谷歌账户注册(可使用国内手机号)后,使用外国人身份购买,官方会给你模板(社会油条子,哈哈)

注意,有些域名后缀首年便宜但是续费巨贵。购买域名前可使用阿里云DNS检测(https://zijian.aliyun.com/)检查域名是否被墙。
2
3
4
一个域名可以添加无数个二级域名(主机名)
例如app.baidu.com,按照同样的操作步骤进行即可:hostname填app,ipv4 address填服务器的ip,TTL填3600。3.vercel导入GitHub镜像博客完成后,可以绑定域名
点击 设置setting-域名Domains:

将已经DNS解析申请完成的域名填入,然后点击add添加,把value填写DNS域名CNAME完毕等待刷新完毕即可。

浏览器访问你买的域名,测试成功效果
装修博客
1.修改封面大图(在魔改中设置一图流被覆盖,如果使用魔改,则跳过这个)
    # The banner image of home page

index_img: https://cdn.pixabay.com/photo/2016/02/07/19/48/aurora-1185464_1280.jpg
2.在主题首页菜单栏新增标签页(根据自己需要增加新页面)
例如,增加“书签”页,在config.xml文件中menu下新增以下内容:(https://fontawesome.com/v4/icons/ 在这个网址中获取图标样式)

    书签: /bookmark/ || fa fa-bookmark
3.新建标签的子页面
“关于”about页面 点击之后默认是会报错的,因为没有这个页面。所以使用命令新建标签页hexo new page about
创建之后,在source文件夹可查看about文件夹

接着 进入到source>>about修改md文件,其内容会同步到新建的about这个页面
2
3
4
5
6
7
8
title: 标签
date: 2024-01-02 14:56:30
type: tags
#updated: 2024-01-02 14:56:30
#description: 頁面描述
#top_img:
---4.博客文章新增(hexo n 第一篇Blog测试)
平时博客文章路径是放在source》posts里面,使用typora软件编写md文件即可,日常使用非常方便(下面是博客文章的抬头)
2
3
4
5
6
7
8
9
10
11
12
13
14
15
16
17
18
19
20
21
title: 零成本费用从0到1搭建Hexo-Butterfly博客并通过GitHub导入vercel托管实现全球访问
tags: Blog
categories: #Hexo
keywords: 关键字
description: 免费搭建个人博客。
#swiper_index: 2
cover: # 添加封面图片链接
copyright_author: LeeTalks
#abbrlink: #'721e0250'
date: 2024-01-07 12:38:42
updated:
top_img:
copyright:
其中:
swiper_index: 2 #数值越大,轮播越靠前
abbrlink: 'xxxx' # 这是后面魔改的,操作方法看后面
top_img: #有cover了一般不配置
copyright: # false为转载不设置复制版权
---修改新增文章模板,在根目录\scaffolds文件夹下面修改post.md文件即可。同理,其他类型页面模板则修改相应的模板。
5.在文章中插入音视频
插入B站视频:(代码示例,视频放在了文章顶部)
2
3
4
5
6
7
8
9
10
11
12
13
14
15
16
17
18
19
20
21
22
23
24
25
26
27
28
29
30
31
32
33
34
35
36
37
已优化:使用时替换src部分即可
<div style="position: relative; width: 100%; height: 0; padding-bottom: 75%;"><iframe
src="//player.bilibili.com/player.html?aid=82237792&bvid=BV1zJ411L76N&cid=140708285&p=1" scrolling="no" border="0"
frameborder="no" framespacing="0" allowfullscreen="true" style="position: absolute; width: 100%;
height: 100%; left: 0; top: 0;"> </iframe></div>
版本二(typora能预览,哈哈)建议使用这个,可以自适应手机宽度。
<iframe width="560" height="315" src="//player.bilibili.com/player.html?aid=82237792&bvid=BV1zJ411L76N&cid=140708285&p=1" frameborder="0" allow="accelerometer; autoplay; clipboard-write; encrypted-media; gyroscope; picture-in-picture; web-share" allowfullscreen></iframe>
<div class="video-box">
<iframe width="560" height="315" src="//player.bilibili.com/player.html?aid=82237792&bvid=BV1zJ411L76N&cid=140708285&p=1"
frameborder="0" allow="accelerometer; autoplay; clipboard-write;
encrypted-media; gyroscope; picture-in-picture" allowfullscreen="">
</iframe>
</div>
<style type="text/css">
.video-box{
position: relative;
width: 100%;
height: 0;
padding-bottom: 56.25%;
}
.video-box iframe{
position: absolute;
top: 0;
left: 0;
width: 100%;
height: 100%;
}
@media screen and (max-width:800px){
.video-box{
width:100%;
}
}
</style>
~~~ 插入YouTube视频:
2
3
4
5
6
7
8
9
10
11
12
13
14
15
16
17
18
19
20
21
22
23
24
25
26
27
28
29
30
31
32
~~~
<div class="video-box">
<iframe width="560" height="315" src="https://www.youtube.com/embed/rFV7wdEX-Mo?si=r5UwnXxgbukTJF1B"
title="YouTube video player" frameborder="0" allow="accelerometer; autoplay; clipboard-write;
encrypted-media; gyroscope; picture-in-picture" allowfullscreen="">
</iframe>
</div>
<style type="text/css">
.video-box{
position: relative;
width: 100%;
height: 0;
padding-bottom: 56.25%;
}
.video-box iframe{
position: absolute;
top: 0;
left: 0;
width: 100%;
height: 100%;
}
@media screen and (max-width:800px){
.video-box{
width:100%;
}
}
</style>
# 下面是官方原版,看看就好
<iframe width="560" height="315" src="https://www.youtube.com/embed/rFV7wdEX-Mo?si=r5UwnXxgbukTJF1B" title="YouTube video player" frameborder="0" allow="accelerometer; autoplay; clipboard-write; encrypted-media; gyroscope; picture-in-picture; web-share" allowfullscreen></iframe>
~~~
官网教程和改造
可以参考butterfly主题官网:https://butterfly.js.org/
其他优秀主题博客参考:https://rawchen.com/
添加gittalk评论
打开这个网页:https://github.com/settings/developers
点击新增oauth > Register a new OAuth applicatio2.输入应用名称、网页地址、介绍和博客网页地址
3.点击“Generate new client secret”
2
3
Client ID : 99ebxxx
Client secrets : b3dfcxxxx4.打开butterfly主题的config.yml文件
分别修改
2
3
4
5
6
7
8
9
10
# Up to two comments system, the first will be shown as default
# Choose: Disqus/Disqusjs/Livere/Gitalk/Valine/Waline/Utterances/Facebook Comments/Twikoo/Giscus/Remark42/Artalk
use: Gitalk # Valine,Disqus(主要是修改这个)
text: true # Display the comment name next to the button
# lazyload: The comment system will be load when comment element enters the browser's viewport.
# If you set it to true, the comment count will be invalid
lazyload: true
count: true # Display comment count in post's top_img
card_post_count: true # Display comment count in Home Page
2
3
4
5
6
7
8
9
# https://github.com/gitalk/gitalk
gitalk:
client_id:
client_secret:
repo: # 写你要把评论数据要保留的仓库(在任意github账户上新建一个仓库,这里写新建的仓库名称)
owner: #一般写你新建仓库对应的github账户名称即可
admin: #一般写你新建仓库对应的github账户名称即可
option: #可空
添加图库
1.使用方式一:跳转文章
2
3
4
5
6
7
ps:最后一个图片我没有正确跳转,可以看看效果。
<div class="gallery-group-main">
{% galleryGroup '壁纸' '收藏的一些壁纸' '/202401/721e0250.html' https://i.loli.net/2019/11/10/T7Mu8Aod3egmC4Q.png %}
{% galleryGroup '漫威' '关于漫威的图片' '/202401/721e0250.html' https://i.loli.net/2019/12/25/8t97aVlp4hgyBGu.jpg %}
{% galleryGroup 'OH MY GIRL' '关于OH MY GIRL的图片' '/Gallery/ohmygirl' https://i.loli.net/2019/12/25/hOqbQ3BIwa6KWpo.jpg %}
</div>
2.使用方式二:创建精美图片库
2
3
4
5
6
7
8
9
10


{% endgallery %}
添加小工具
1.花式按钮添加链接
Butterfly Butterfly Butterfly Butterfly Butterfly Butterfly Butterfly
2
3
4
5
6
7
{% btn 'https://butterfly.js.org/',Butterfly,far fa-hand-point-right,blue larger %}
{% btn 'https://butterfly.js.org/',Butterfly,far fa-hand-point-right,pink larger %}
{% btn 'https://butterfly.js.org/',Butterfly,far fa-hand-point-right,red larger %}
{% btn 'https://butterfly.js.org/',Butterfly,far fa-hand-point-right,purple larger %}
{% btn 'https://butterfly.js.org/',Butterfly,far fa-hand-point-right,orange larger %}
{% btn 'https://butterfly.js.org/',Butterfly,far fa-hand-point-right,green larger %}2.高亮所需的文字
default blue pink red
3.添加时间线
2
3
4
5
6
7
8
9
10
11
<!-- timeline 01-01 -->
元旦快乐。
<!-- endtimeline -->
<!-- timeline 01-02节后 -->
假期还有最后一天。
<!-- endtimeline -->
<!-- timeline 上班快乐... -->
人生啊。
<!-- endtimeline -->
{% endtimeline %}
2024
01-01
元旦快乐。
01-02节后
假期还有最后一天。
上班快乐…
人生啊。
4.添加友链
2
3
4
5
6
7
8
9
10
11
12
13
- class_name: 网站
class_desc: 值得推荐的网站
link_list:
- name: Youtube
link: https://www.youtube.com/
avatar: https://i.loli.net/2020/05/14/9ZkGg8v3azHJfM1.png
descr: 视频网站
- name: Twitter
link: https://twitter.com/
avatar: https://i.loli.net/2020/05/14/5VyHPQqR6LWF39a.png
descr: 社交分享平台
{% endflink %}
SEO优化
1.将
url直接改成sitename/title的形式,并且title最好是用英文,在根目录的配置文件下修改permalink如下:(这样优化的目的是,文章链接被优化成了两层结构,有利于网站引擎爬取博客)
2
3
4
root: /
permalink: :title.html #:year/:month/:day/:title/
permalink_defaults: 安装中文标题自动转换为拼音插件:(如果使用插件优化url则跳过这个)
2
3
4
5
6
npm i hexo-permalink-pinyin --save
# 在根目录的_config.yml 文件中,新增以下的配置项:
permalink_pinyin:
enable: true
separator: '-' # default: '-' 使用插件优化url:
2
3
4
5
6
7
8
9
10
11
12
npm install hexo-abbrlink --save
# 修改根目录yml文件,粘贴覆盖
url: https://
root: /
#permalink: :title.html #:year/:month/:day/:title/
permalink: :year:month/:abbrlink.html
abbrlink:
alg: crc32
rep: hex
permalink_defaults: 文章字数统计插件安装:
2
3
4
5
6
7
8
9
# 在主题下的 _config.yml 文件中,激活以下配置项即可:
# wordcount (字數統計)
# see https://butterfly.js.org/posts/ceeb73f/#字數統計
wordcount:
enable: true
post_wordcount: true
min2read: true
total_wordcount: true2.让Google收录你的站点:
先安装插件
然后访问
你的首页/sitemap.xml就可以看到网站地图了
- 注册账号
- 验证站点
- 提交
sitemap向
sitemap后: 进入Google Search Console- 抓取 - 站点地图,点击「添加/测试站点地图」,输入你的博客网址. 若无报错则站点地图提交成功
过会儿,测试一下文章和网址是否已经Google辨识。
同样,必应收录也是很简单,进入必应站长。注册或登录,必应收录有两种方式,一种使用刚刚谷歌导入过去,第二种是就是自己添加URL
3.提交 robots.txt(根据自己需要设置)
robots.txt是一种存放于网站根目录下的ASCII编码的文本文件,它的作用是告诉搜索引擎此网站中哪些内容是可以被爬取的,哪些是禁止爬取的。robots.txt放在博客目录下的source文件夹中,博客生成后在站点目录/public/下。
2
3
4
5
6
7
8
9
Allow: /
Allow: /archives/
Allow: /categories/
Allow: /about/
Disallow: /js/
Disallow: /css/
Disallow: /fonts/
Disallow: /vendors/
robots.txt文件更新至网站后可进入Google Search Console- 抓取 -robots.txt测试工具进行测试。4.添加不蒜子(站点访问数据统计,开启后在我的博客右下角显示访客流量):
取巧,因为不蒜子用的人多,现在官网注册已经关闭了,所以找了热心网友开源的平替方案:
2
3
4
5
6
7
8
因为本博客是 Butterfly 主题:
需修改文件layout/includes/additional-js.pug,位于 72 行左右:
script(async data-pjax src='//busuanzi.ibruce.info/busuanzi/2.3/busuanzi.pure.mini.js')
改为:
script(async data-pjax src='//npm.elemecdn.com/penndu@1.0.0/bsz.js')5.平替方案二(vercel原生统计功能)
别划走。。。可以同时开启vercel的Web Analytics免费计划,可以在vercel官方下查看托管的博客访问数据详情(其中就有访问地图,按日期生成折线趋势图)。简直太良心!
首先登入 vercel,选择自己的一个网站进入详情页面。点击上方的 Analytics 选项卡。
Next确认自己的 Plan,继续点击 Enable。
这时候,Web Analytics 的启用进入一个等待状态,Vercel 提示我们需要安装 @vercel/analytics 包并且要导入进我们的工程里才能生效。
2
3
4
5
6
inject:
head:
# - <link rel="stylesheet" href="/xxx.css">
bottom:
- <script defer src="/_vercel/insights/script.js"></script> 然后将本地博客推送更新。
等待 Vercel 部署成功后,按照提示访问一下我们的网站生成访客数据,使得 Web Analytics 生效。
访问博客地址随机浏览测试。Web Analytics 一旦检测到访客数据,会立即自行启用,点击 Start exploring,大功告成!
魔改教程
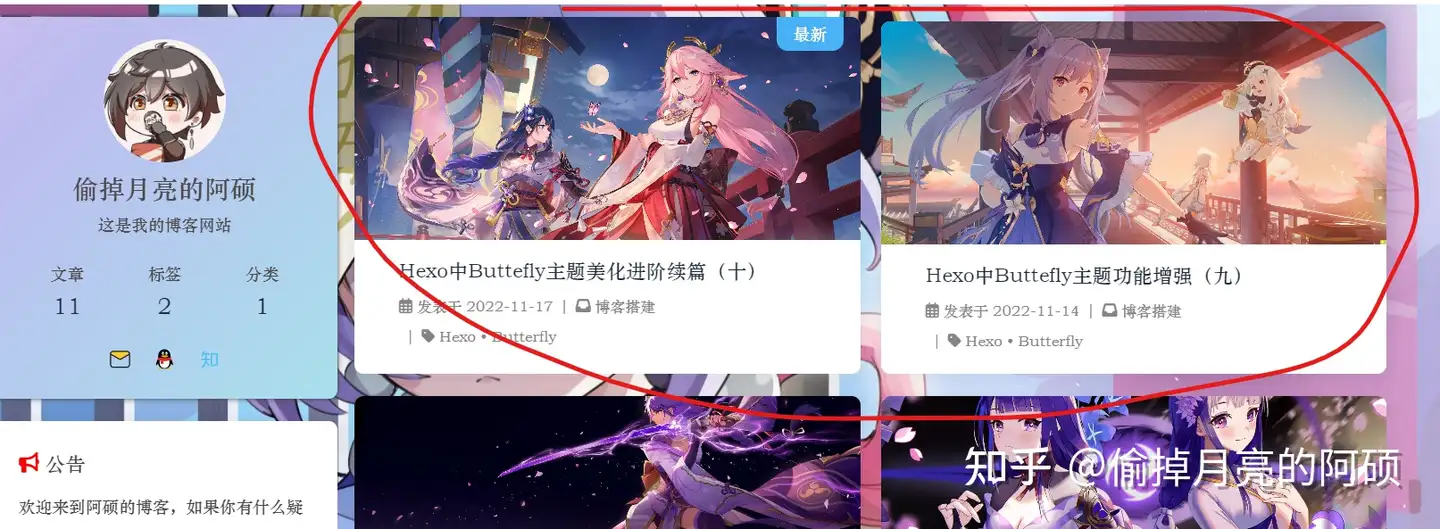
1.文章双栏布局:
2
3
4
5
npm i hexo-butterfly-article-double-row --save
# 网站根目录_config 配置项 (不是主题的):添加下面配置
butterfly_article_double_row:
enable: true
2.文章轮播
2
3
4
5
6
7
8
9
10
11
12
13
14
15
16
17
18
19
20
21
npm install hexo-butterfly-swiper --save
#在站点配置文件_config.yml或者主题配置文件_config.butterfly.yml中添加
# hexo-butterfly-swiper
# see https://akilar.top/posts/8e1264d1/
swiper:
enable: true # 开关
priority: 5 #过滤器优先权
enable_page: / # 应用页面
timemode: date #date/updated
layout: # 挂载容器类型
type: id
name: recent-posts
index: 0
default_descr: 再怎么看我也不知道怎么描述它的啦!
swiper_css: https://npm.elemecdn.com/hexo-butterfly-swiper/lib/swiper.min.css #swiper css依赖
swiper_js: https://npm.elemecdn.com/hexo-butterfly-swiper/lib/swiper.min.js #swiper js依赖
custom_css: https://npm.elemecdn.com/hexo-butterfly-swiper/lib/swiperstyle.css # 适配主题样式补丁
custom_js: https://npm.elemecdn.com/hexo-butterfly-swiper/lib/swiper_init.js # swiper初始化方法 使用方法:在文章的
front_matter中添加swiper_index配置项即可
2
3
4
5
6
7
8
9
10
11
12
date: 2024-01-02 15:38:42
tags: Blog # 用来分类文章标签:
updated: 2024-01-04 14:56:30
categories: 生活随笔 # 文章分类:纪实媒体 音乐 书籍 演讲 电视剧(电影动漫游戏)
keywords: 博客搭建
description: 搭建个人博客。
swiper_index: 2 #数值越大越靠前
top_img: #有cover了一般不配置
cover: https://cdn.pixabay.com/photo/2017/02/20/18/03/cat-2083492_1280.jpg
copyright_author: LeeTalks
copyright: # false为转载不设置复制版权3.设置butterfly主题“一图流”
在”\source\js” 文件下新建名为”background.js”的文件,粘贴以下内容:
2
3
4
5
6
head:
# - <link rel="stylesheet" href="/xxx.css">
bottom:
# - <script src="xxxx"></script>
- <script src="/js/background.js"></script> 修改主题的”config.yml” 的”banner” 关键词,粘贴覆盖以下内容:
2
3
4
5
6
7
8
9
10
11
12
13
14
15
16
17
18
19
20
21
index_img:
# If the banner of page not setting, it will show the top_img
default_top_img: #https://cdn.pixabay.com/photo/2016/02/07/19/48/aurora-1185464_1280.jpg
# The banner image of archive page
archive_img:
# If the banner of tag page not setting, it will show the top_img
# note: tag page, not tags page (子標籤頁面的 top_img)
tag_img:
# The banner image of tag page
# format:
# - tag name: xxxxx
tag_per_img:
# If the banner of category page not setting, it will show the top_img
# note: category page, not categories page (子分類頁面的 top_img)
category_img: 搜索关键词”background”, 覆盖粘贴:
2
3
4
# can set it to color or image (可設置圖片 或者 顔色)
# The formal of image: url(http://xxxxxx.com/xxx.jpg)
background: url(http://zfe.space/images/tianqizhizi.jpg) #"#00000000" 修改主题文件”\source\css\_layout” 的”head.styl” 文件,覆盖粘贴:
2
3
4
5
6
7
8
position: relative
width: 100%
//background-color: $light-blue
background-position: center center
background-size: cover
background-repeat: no-repeat
//transition: all .5s4.添加跳动的心
2
3
4
5
6
7
8
9
10
11
12
13
14
15
16
17
18
19
20
21
#footer-wrap
if theme.footer.owner.enable
- var now = new Date()
- var nowYear = now.getFullYear()
if theme.footer.owner.since && theme.footer.owner.since != nowYear
.copyright!= `©${theme.footer.owner.since} - ${nowYear + ' '} <i id="heartbeat" class="fa fas fa-heartbeat"></i> ${config.author}`
else
.copyright!= `©${nowYear + ' '} <i id="heartbeat" class="fa fas fa-heartbeat"></i> ${config.author}`
if theme.footer.copyright
.framework-info
span= _p('footer.framework') + ' '
a(href='https://hexo.io')= 'Hexo'
span.footer-separator |
span= _p('footer.theme') + ' '
a(href='https://github.com/jerryc127/hexo-theme-butterfly')= 'Butterfly'
if theme.footer.custom_text
.footer_custom_text!=`${theme.footer.custom_text}`
<link rel="stylesheet" href="https://fastly.jsdelivr.net/gh/HCLonely/images@master/others/heartbeat.min.css">5.修改字体
在css文件添加下面这段(根据需要可以自定义):
2
3
4
5
6
7
8
9
10
11
12
13
font-family: 'tzy';
/* 字体名自定义即可 */
/* src: url('https://cdn.jsdelivr.net/gh/tzy13755126023/BLOG_SOURCE/font/ZhuZiAWan.woff2'); */
src: url('https://npm.elemecdn.com/ethan4116-blog/lib/font/ZhuZiAWan.ttf');
/* 字体文件路径 */
font-display: swap;
}
body,
.gitcalendar {
font-family: tzy !important;
}6.自定义页脚
2
3
4
5
6
7
8
9
10
11
12
13
14
15
16
17
18
19
20
21
22
#ft
.ft-item-1
.t-top
.t-t-l
p.ft-t.t-l-t 说点什么
.bg-ad
div
| 人在干,天在看。
.btn-xz-box
a.btn-xz(href='https://fe32.top/') 点击跳转到哪儿
.t-t-r
p.ft-t.t-l-t 修仙导航
ul.ft-links
li
a(href='https://fe32.top/articles/hexo1600/') 建站指南
.ft-item-2
p.ft-t 推荐友链
.ft-img-group
.img-group-item
a(href='https://fe32.top/')
img(src='https://bu.dusays.com/2022/05/02/626f92e193879.jpg' alt='')7.顶部图片下移
在\themes\butterfly\source\css_page目录下,新建topimg.styl文件
2
3
4
5
6
7
8
9
10
11
12
13
14
15
16
17
18
19
20
21
22
23
// 顶部图
#page-header, #page-header:before
background-color: transparent !important
background-image: unset !important
.top-img
height: 12.5rem
display: block
margin: -50px -40px 50px -40px
border-top-left-radius: inherit
border-top-right-radius: inherit
background-position: center center
-webkit-background-size: cover
-moz-background-size: cover
background-size: cover
background-repeat: no-repeat
transition: all 0.3s
.read-mode
display: none
@media screen and (max-width: 768px)
margin: -1.8rem -0.7rem 1.8rem -0.7rem
[data-theme='dark'] &
filter: brightness(0.8) 同时在\themes\butterfly\layout修改post.pug文件:
2
3
4
5
6
7
8
block content
#post
if top_img === false
include includes/header/post-info.pug
.top-img.gist(style=`background-image: url(${url_for(top_img)})`)
article#article-container.post-content!=page.content8.修改鼠标样式
在themes\butterfly\source\css路径下新建cursor.css文件
2
3
4
5
6
7
8
9
cursor: url(https://cdn.jsdelivr.net/gh/sviptzk/HexoStaticFile@latest/Hexo/img/default.cur),
default;
}
a, img {
cursor: url(https://cdn.jsdelivr.net/gh/sviptzk/HexoStaticFile@latest/Hexo/img/pointer.cur),
default;
} 然后修改主题yml配置:
2
3
4
inject:
head:
- <link rel="stylesheet" href="/css/cursor.css">9.修改页脚透明渐变
在8里面cursor.css文件中增加以下内容,即可:
2
3
4
5
6
7
8
9
10
11
12
13
14
15
16
17
18
19
background: rgba(255,255,255,.15);
color: #000;
border-top-right-radius: 20px;
border-top-left-radius: 20px;
backdrop-filter: saturate(100%) blur(5px)
}
#footer::before {
background: rgba(255,255,255,.15)
}
#footer #footer-wrap {
color: var(--font-color)
}
#footer #footer-wrap a {
color: var(--font-color)
}10.增加本地搜索功能
2
3
4
5
6
7
8
9
10
11
12
13
npm install hexo-generator-search --save
#在Hexo博客的配置文件_config.yml中,添加以下配置:
search:
path: search.xml
field: post
format: html
limit: 10000
#在butterfly的配置yml中,修改local_search的enable为true
local_search:
enable: true11.文章加密
2
3
4
5
6
7
8
9
10
11
12
13
14
15
16
17
# 如果安装报错,检查更新npm
npm config set strict-ssl false
npm install -g npm@10.3.0
# 1.在根目录_config.yml文件中添加
encrypt: # hexo-blog-encrypt
silent: true
abstract: 这是一篇加密文章,需要输入正确的密码才能继续阅读。
message: 当前文章暂不对外可见,请输入访问密码后查看!
tags: # 设置指定 tags 为加密文章,当文章设置了指定 tags 后自动加密
- {name: private, password: hello}
wrong_pass_message: 抱歉,您输入的密码错误,请检查后重新输入。
wrong_hash_message: 抱歉, 当前文章不能被校验, 不过您还是可以看看解密后的内容。
# 2.后面每次写文章除了使用tag来控制加密,还可以添加password来自定义加密密码
password: 123412.懒人封面链接
2
3
4
5
6
7
https://blog.lmiml.com/wp-content/uploads/2022/11/C9C5FAA8-1496-4D5B-BBB9-B8E775C7B2AF.jpeg
https://ainyi.com/upload/cover/154.avif
可底图可配图
https://ainyi.com/upload/cover/154.avif
# 可使用的平台外链
微信图片会被屏蔽,但知乎的可以,建议使用知乎的外部图片链接。
博客加载访问速度优化(完结篇)
(根据需要进行设置)
1.压缩静态资源
2
3
4
5
6
7
8
9
10
11
12
13
14
15
16
17
18
19
20
21
22
23
24
25
26
# 在站点配置文件_config.yml 中添加以下代码:
# 博文压缩
neat_enable: true
# 压缩html
neat_html:
enable: true
exclude:
# 压缩css
neat_css:
enable: true
exclude:
- '**/*.min.css'
# 压缩js
neat_js:
enable: true
mangle: true
output:
compress:
exclude:
- '**/*.min.js'
- '**/jquery.fancybox.pack.js'
- '**/index.js'
- '**/fireworks.js'2.图片懒加载
2
3
4
5
6
7
8
9
# _config.yml 中添加以下代码:
# 图片懒加载
lazyload:
enable: true
onlypost: false
loadingImg: /images/loading.gif


